

Okay, let’s be honest for a second. Most “easy” fudge recipes out there have like seven ingredients and a candy thermometer. That’s not my idea of a good time.
This velvety 3-ingredient fudge is the real deal. You get that melt-in-your-mouth chocolate treat without any fuss or fancy equipment.
I’ve made this for holiday cookie swaps, last-minute movie nights, and even just because I had a bad Tuesday. It never fails. Ready to make some magic?
1. Allergens
This fudge contains milk (from sweetened condensed milk and butter) and soy (most chocolate chips contain soy lecithin). It may also contain traces of tree nuts or peanuts depending on your chocolate brand.
If you need a dairy-free version, use vegan sweetened condensed coconut milk and dairy-free butter or coconut oil. For soy-free, look for soy-free chocolate chips (Enjoy Life brand works great).
Always check your labels, especially if serving someone with severe allergies. This recipe is naturally gluten-free if your ingredients are certified gluten-free.
2. Ingredient notes & substitutions
You only need three things: good-quality chocolate chips, sweetened condensed milk, and butter. Do not use evaporated milk – that’s a very different thing, and your fudge will turn into a crumbly mess. For a deeper flavor, swap semi-sweet chips for dark chocolate or milk chocolate.
3. Pro tips
Use a metal or glass 8×8 pan lined with parchment paper – this makes removal a dream. If you use a non-stick pan, the fudge might release but the corners can stick. Spray the parchment lightly with non-stick spray for extra insurance.
Don’t overheat the mixture. Melt everything over low heat (or in short microwave bursts) just until combined. Overcooking makes the fudge grainy, and nobody wants that.
Let the fudge set at room temperature for 30 minutes, then move it to the fridge for at least 2 hours. Patience is hard, but rushing leads to sticky knives and sad, smooshed squares.
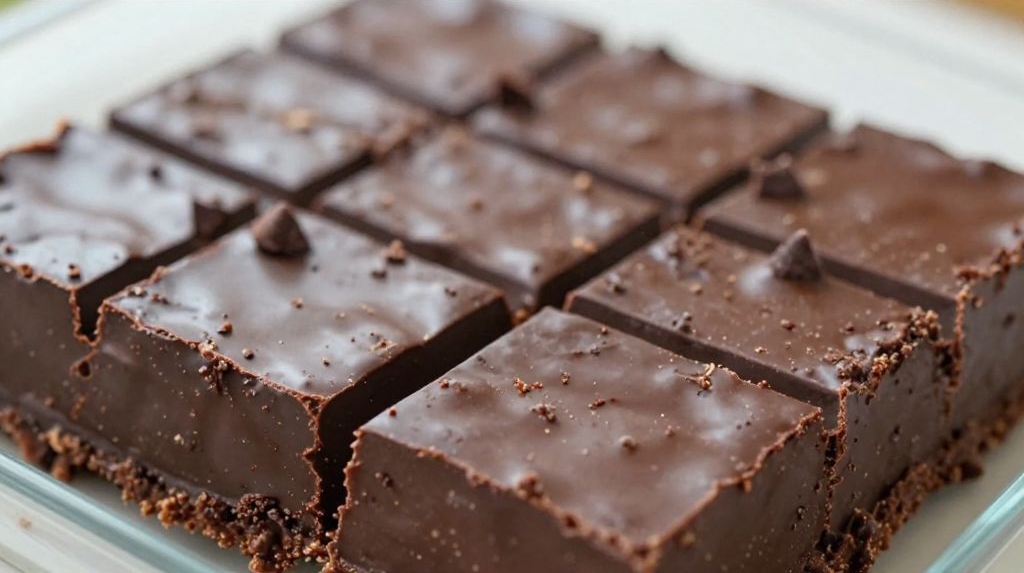
For perfectly clean cuts, use a long chef’s knife and wipe the blade between each slice. Run the knife under hot water, dry it quickly, then slice. This trick gives you those gorgeous, professional-looking pieces.
4. Storage & make-ahead (fridge/freezer)
Store this fudge in an airtight container in the fridge for up to 2 weeks. Layer pieces between wax paper if stacking – they can stick to each other when cold.
Freeze for up to 3 months by wrapping individual squares tightly in plastic wrap, then placing them in a freezer bag. Thaw overnight in the fridge before serving. This makes it a perfect make-ahead holiday treat.
5. Serving suggestions (complete the meal)
Serve a few squares on a dessert board with fresh berries, salted pretzels, and a drizzle of caramel sauce. The sweet-and-salty combo is pure magic.
Crush a piece of fudge over vanilla bean ice cream or stirred into hot coffee for a mocha twist. I won’t judge if you eat it straight from the fridge at 10 PM.
For a fancier dessert, pair it with a small glass of bourbon or a hot mug of peppermint tea. The richness balances beautifully with something slightly bitter or herbal.
These also make adorable edible gifts – stack five pieces in a clear cellophane bag tied with a ribbon. Add a handwritten tag that says “For emergency chocolate situations.”
And if you’re feeling wild, sprinkle flaky sea salt or crushed freeze-dried raspberries on top right after pouring. The salt cuts the sweetness, and raspberries add a pop of color.
6. “Use your leftovers” (reduce waste)
Leftover fudge? That’s a funny concept at my house, but if you have some, chop it into small chunks and fold into cookie dough or brownie batter. Fudge-stuffed chocolate chip cookies are next-level.
Melt leftover pieces with a splash of heavy cream to make a quick chocolate sauce for pancakes or sundaes. Just warm gently and stir until smooth.
You can also crumble it over yogurt parfaits or blend it into a milkshake. One time I dropped a cube into my oatmeal – weirdly delicious.
If you really overdid it, freeze individual portions and use them as “emergency chocolate coins.” Give them to friends as random acts of kindness.
Got a crumbly batch? Pulse the crumbs in a food processor and mix with melted butter to make a no-bake pie crust. Press into a pan, chill, and fill with pudding or cheesecake filling.
Even the last sticky bits stuck to the pan can be soaked in warm milk for hot chocolate. No waste, only chocolate happiness.
7. Common mistakes & how to fix them
Grainy fudge happens when you overheat the chocolate or let water get into the mixture. Use low heat and make sure your bowl is completely dry. If it’s already grainy, don’t panic – melt it down with a tablespoon of coconut oil and use it as a sauce instead.
Fudge that won’t set usually means you didn’t use the right ratio of chocolate to condensed milk. Trust the can size (14 oz condensed milk to 2 cups chocolate chips). If it’s too soft, try freezing it for an hour – it’ll firm up enough to eat, though it’ll be more like a truffle texture.
White streaks or spots (called blooming) happen when chocolate gets too warm then cools. It’s still perfectly safe and tasty – just a cosmetic issue. Next time, melt more gently and don’t let the fudge sit in a hot kitchen.
8. Variations by diet or flavor profile
Swap butter for coconut oil and use vegan condensed coconut milk to make this dairy-free and vegan. The texture will be slightly softer, but still velvety.
9. “Why this recipe works” / The science
Sweetened condensed milk is the secret weapon here. It has a high sugar and fat content with very little water, which prevents the chocolate from seizing. The sugar molecules also interfere with crystal formation, giving you that smooth, non-grainy texture.
Butter adds a bit more fat and a silky mouthfeel. Fat coats the cocoa solids so they melt gently on your tongue instead of feeling waxy or dry.
When you heat the mixture only until combined, you avoid melting the cocoa butter out of the chocolate. That’s what keeps the fudge firm at room temperature yet soft when you bite into it. No thermometer, no double boiler drama – just simple chemistry working in your favor.
10. Frequently Asked Questions (FAQ)
Can I use white chocolate chips? Yes! Use high-quality white chocolate and add a teaspoon of vanilla extract. The result is a creamy, vanilla-kissed fudge that’s great with dried cranberries or pistachios folded in.
Why is my fudge too soft? You either used too much butter or your chocolate had a lower cocoa butter content. Chill it longer (4+ hours) and next time, use a brand like Ghirardelli or Guittard for reliable results.
11. Call to action (comment, share, subscribe)
Now I need to hear from you. Have you tried this velvety 3-ingredient fudge yet? Drop a comment below and let me know if you added any fun mix-ins – I’m a big fan of crushed candy canes during the holidays.
If this recipe saved your sanity during party prep or just made your Tuesday better, share it with a friend who loves chocolate as much as you do. Then hit that subscribe button so you never miss another ridiculously easy dessert.
I read every comment (seriously, I do), and your feedback helps me create more recipes like this. Tag me on social media with your fudge photos – I live for those glossy square shots. And hey, if you messed up the first time? Tell me about that too. We’ve all been there.
Conclusion
So there you have it – a fudge that’s creamy, chocolatey, and almost embarrassingly simple. You don’t need a pastry degree or a cupboard full of exotic ingredients. Just three staples and about five minutes of active work.
Give it a try this weekend. Your coworkers, kids, or just your own late-night self will thank you. And when you see how fast it disappears, go ahead and double the batch. You’ve been warned.
Now go make some fudge. Then come back and tell me how many pieces you “accidentally” ate before they cooled. I won’t tell anyone.
Recipe Name: Velvety 3-Ingredient Fudge
Servings: 16
Estimated Cost Per Serving: $0.35
Prep Time: 5 minutes
Cook Time: 2 minutes
Total Time: 2 hours 7 minutes (includes chilling)
Course: Dessert
Cuisine: American
Calories Per Serving: 152
Diet: Vegetarian, Gluten-Free
Difficulty: Easy
Ingredients:
- 2 cups (340g) semi-sweet chocolate chips (or chopped chocolate)
- 1 can (14 oz / 397g) sweetened condensed milk
- 2 tablespoons (28g) unsalted butter
Instructions:
First, line an 8×8 inch square baking pan with parchment paper, leaving some overhang on two opposite sides. Lightly spray the parchment with non-stick spray.
In a medium microwave-safe bowl, combine the chocolate chips, sweetened condensed milk, and butter. Microwave in 30-second bursts on 50% power, stirring after each burst, until the mixture is completely smooth and glossy (about 1 to 1.5 minutes total). Alternatively, melt over a double boiler on low heat.
Pour the warm fudge mixture into the prepared pan. Spread it evenly with a rubber spatula. Tap the pan gently on the counter to release any air bubbles.
Let the fudge cool at room temperature for 30 minutes, then cover and refrigerate for at least 2 hours, or until completely firm.
Lift the fudge out of the pan using the parchment overhang. Place on a cutting board. Using a hot, dry knife, cut into 16 squares (or smaller pieces). Wipe the knife clean between each cut for neat edges.
Serve chilled or at room temperature. Store leftovers in an airtight container in the refrigerator.