

You know that endless debate about whether the center or the edge is the best part of a cookie cake? I’m firmly Team Edge. That glorious, caramelized crunch with a hint of butteriness is worth fighting over.
But most homemade cookie cakes turn into one uniform, pillowy blob. No drama, no texture, just a giant soft cookie. That’s boring.
After dozens of tests (and a few sad, greasy puddles), I finally cracked the code. The secret is a combination of brown butter, an extra egg yolk, and baking in a specific pan that maximizes edge surface area. Ready to become a cookie cake hero?
1. Allergens
This recipe contains wheat (gluten), dairy (butter, milk), and eggs. It also includes chocolate, which is usually dairy-free but check your brand.
For a dairy-free version, use vegan butter sticks (like Miyoko’s or Earth Balance) and dairy-free chocolate chips. The brown butter step won’t work with vegan butter, so just melt it and skip the browning.
For an egg allergy, try a commercial egg replacer (like Bob’s Red Mill) mixed with water, but expect a slightly less chewy texture. Gluten-free? Swap all-purpose flour with a cup-for-cup gluten-free flour blend that contains xanthan gum – King Arthur’s works beautifully.
2. Ingredient notes & substitutions
Brown sugar is non-negotiable here. The molasses in brown sugar creates that chewy edge. If you only have white sugar, add two tablespoons of molasses per cup of white sugar and mix well.
Use semi-sweet or dark chocolate chips – milk chocolate melts too much and can make the cake greasy. I love Ghirardelli 60% cacao for that deep flavor without being bitter.
3. Pro tips
Brown your butter first, then let it cool for exactly 10 minutes. Hot butter will melt your sugar and ruin the texture. While it cools, measure out your dry ingredients.
Press the dough into the pan with damp fingers – this prevents sticking to your hands and creates an even layer. Chill the dough for 30 minutes before baking. Yes, it’s an extra step, but it solidifies the butter and prevents spreading.
The best pan for chewy edges is a 9-inch springform pan because the tall sides create more edge-to-center ratio. No springform? A 9-inch round cake pan works, but grease it heavily.
Sprinkle flaky sea salt on top right before baking. It’s not optional – the salt contrasts with the sweet chocolate and makes every bite sing.
4. Storage & make-ahead (fridge/freezer)
You can make the dough up to 3 days ahead. Wrap it tightly in plastic wrap and refrigerate. When you’re ready, let it sit on the counter for 20 minutes before pressing into the pan – cold dough is too stiff.
Baked cookie cake stays fresh at room temperature for 3 days in an airtight container. Place a slice of white bread inside the container – it absorbs excess moisture and keeps the edges from getting soft.
To freeze, wrap individual slices in plastic wrap, then foil, and freeze for up to 3 months. Thaw on the counter for an hour or microwave for 15 seconds. For the whole cake, freeze it unsliced on a baking sheet until firm, then wrap tightly – that’s a game-changer for last-minute dessert emergencies.
Do not refrigerate the baked cake unless you live in a sauna. The fridge dries out the edges (the opposite of what we want) and makes the chocolate bloom white.
5. Serving suggestions (complete the meal)
This cookie cake is dessert on its own, but let’s be honest – a scoop of vanilla bean ice cream melted into the warm center is heaven. Serve it with a drizzle of salted caramel sauce if you want to feel fancy.
For a casual party spread, cut it into thin wedges and arrange on a platter with fresh berries and whipped cream. Pair with cold milk (obviously) or a strong cup of black coffee to cut the sweetness.
6. “Use your leftovers” (reduce waste)
Crumbled leftover cookie cake makes an incredible ice cream topping or pie crust. Pulse it in a food processor with two tablespoons of melted butter, press into a tart pan, and bake at 350°F for 10 minutes.
You can also freeze the crumbles in a baggie and use them as a “cookie crumb” for yogurt parfaits. No crumb left behind, friend.
7. Common mistakes & how to fix them
Mistake #1: Your cookie cake spread into a thin, greasy puddle. That means your butter was too warm or you didn’t chill the dough. Fix: next time, chill for a full hour and use a springform pan to contain it.
Mistake #2: The edges are hard and burnt. Your oven runs hot – invest in an oven thermometer. Bake at 325°F instead of 350°F and check five minutes early. Dark pans also bake faster, so reduce heat by 25°F.
Mistake #3: The center is raw while edges are dark. You overpacked the dough into the pan. Press it evenly, leaving a slight dip in the middle (like a cookie cake from the mall). The dip helps heat distribute evenly.
Mistake #4: No chewy edges at all. You used white sugar instead of brown, or you didn’t brown the butter. Brown butter creates those caramelized compounds – don’t skip it.
8. Variations by diet or flavor profile
Vegan version: Use plant-based butter sticks (not tub margarine – too much water) and a flax egg (1 tbsp ground flax + 3 tbsp water, let sit 5 mins). Reduce baking time by 2-3 minutes.
Gluten-free: Cup-for-cup GF flour works, but add an extra egg yolk for chewiness. My favorite is King Arthur’s Measure for Measure. Peanut butter chocolate chip: Replace 1/4 cup of the flour with 1/4 cup of powdered peanut butter (like PB2) and use peanut butter chips instead of half the chocolate chips.
Salted caramel mocha: Add 2 tbsp instant espresso powder to the dry ingredients and swirl in 1/4 cup of caramel sauce after pressing the dough into the pan.
9. “Why this recipe works” / The science
Brown butter is the real MVP here. When you cook butter until the milk solids toast, you create compounds like furanones and pyrazines – the same molecules that make toasted marshmallows and roasted coffee smell amazing. Those compounds cling to the edges and brown faster during baking.
The extra egg yolk adds fat and emulsifiers (lecithin), which prevents the cookie cake from becoming crumbly. Yolks also trap moisture, so the edges stay chewy instead of turning into rocks.
Chilling the dough solidifies the butter, so when it hits the oven, the butter melts slowly. That gives the flour time to absorb moisture before the fat spreads everything out. Slower melting = thicker, chewier edges. It’s a beautiful thing.
10. Frequently Asked Questions (FAQ)
Can I use a cookie sheet instead of a pan? Technically yes, but you’ll lose those tall chewy edges. The dough will spread into a thin, crispy disk. Use a 9-inch springform for the real deal.
Why did my cookie cake stick to the pan? You either forgot to grease the pan (oops) or you didn’t line the bottom with parchment paper. Always grease AND line – the sugar caramelizes like glue.
Can I make this without brown butter? You can, but then it’s just a regular chocolate chip cookie cake. Brown butter is the secret I promised in the title, so… don’t skip it unless you have to.
How do I know when it’s done baking? The edges should be deep golden brown and slightly pulled away from the sides. The center will look slightly underdone – that’s perfect. It continues cooking as it cools.
Can I double the recipe for a bigger cake? Yes, use a 10-inch springform pan and increase bake time by 5-8 minutes. Check with a toothpick – it should come out with moist crumbs, not wet batter.
11. Call to action (comment, share, subscribe)
Did this chewy-edged cookie cake change your life as much as it changed mine? Drop a comment below telling me if you’re Team Edge or Team Center – I won’t judge (okay, I’ll judge a little). Snap a photo of your caramelized masterpiece and tag me on Instagram so I can hype you up.
If you want more brown butter baking disasters (and successes), hit that subscribe button. I send out one ridiculous dessert recipe every Friday, no spam, just sugar.
Conclusion
So here’s the deal: that perfect chewy-edged, soft-centered, chocolate-studded cookie cake is fifteen minutes of active work away. You brown butter, you chill dough, you bake in a springform pan, and suddenly you’re the person everyone wants at the potluck.
I’ve made this for three birthday parties and one “I had a bad day and need butter” Tuesday. Every single time, the edges disappear first. Make it tonight, save a slice for breakfast, and remember – the secret was you trying something new.
Now go preheat that oven.
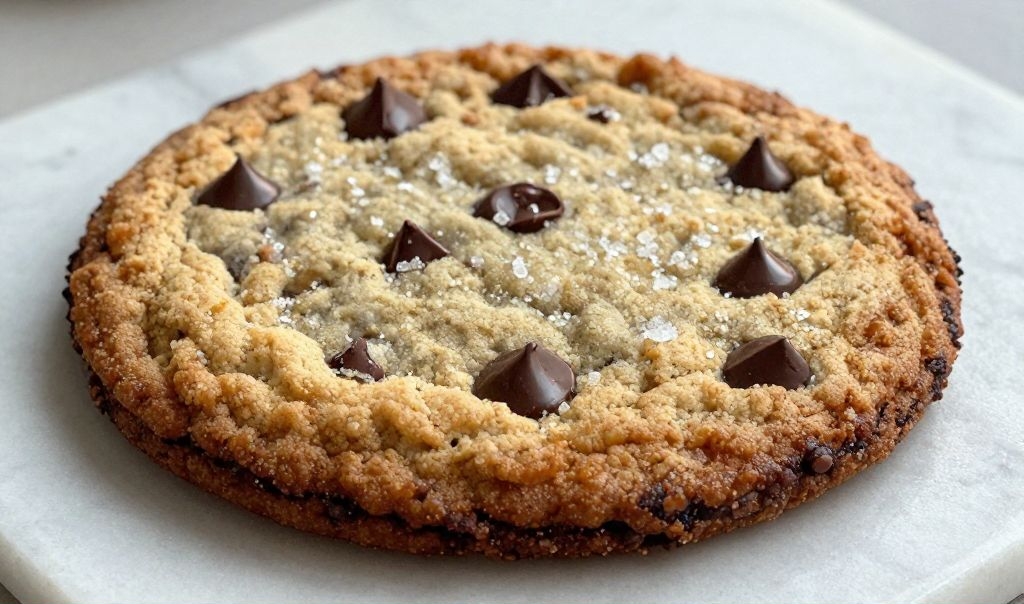
Recipe Name: The Chewy-Edged Chocolate Chip Cookie Cake
Servings: 8 slices
Estimated Cost Per Serving: $0.85
Prep Time: 20 minutes (plus 30 minutes chilling)
Cook Time: 22 minutes
Total Time: 1 hour 12 minutes
Course: Dessert
Cuisine: American
Calories Per Serving: 420
Diet: None
Difficulty: Easy
Ingredients
- 1 cup (226g) unsalted butter
- 1 cup (200g) packed light brown sugar
- 1/2 cup (100g) granulated sugar
- 2 large eggs + 1 egg yolk (room temperature)
- 2 teaspoons vanilla extract
- 2 1/4 cups (270g) all-purpose flour
- 1 teaspoon baking soda
- 1/2 teaspoon fine sea salt
- 1 1/2 cups (255g) semi-sweet chocolate chips
- Flaky sea salt (for topping)
Instructions
First, preheat your oven to 350°F (325°F if using a dark pan). Grease a 9-inch springform pan and line the bottom with a parchment paper circle.
Brown the butter: Cut the butter into tablespoon-sized pieces and melt in a light-colored saucepan over medium heat. Stir constantly with a silicone spatula. After 4-5 minutes, the butter will foam, then turn nutty and golden brown with dark specks at the bottom. Immediately pour into a heatproof bowl – do not scrape the burnt bits. Let cool for exactly 10 minutes.
In a large mixing bowl, whisk together the brown sugar, granulated sugar, and the cooled browned butter (it should still be liquid but not hot). Add the eggs, egg yolk, and vanilla, then whisk vigorously for 1 minute until the mixture looks thickened and glossy.
In a separate bowl, whisk the flour, baking soda, and fine sea salt. Gradually add the dry ingredients to the wet bowl, mixing with a wooden spoon until just combined – a few streaks of flour are fine. Fold in the chocolate chips.
Chill the dough: Cover the bowl with plastic wrap and refrigerate for 30 minutes. Set a timer – don’t skip this.
Press the chilled dough into the prepared springform pan. Dampen your fingers with water to prevent sticking, then press evenly with a slight dip in the middle. Sprinkle flaky sea salt generously over the top.
Bake on the middle rack for 20-22 minutes. The edges should be deeply golden and the center will look slightly underdone (a toothpick inserted near the edge will come out clean, but the center will have moist crumbs). Let the cookie cake cool in the pan for 15 minutes, then remove the springform ring and cool completely on a wire rack. Slice into wedges and fight your family for the edge pieces.