
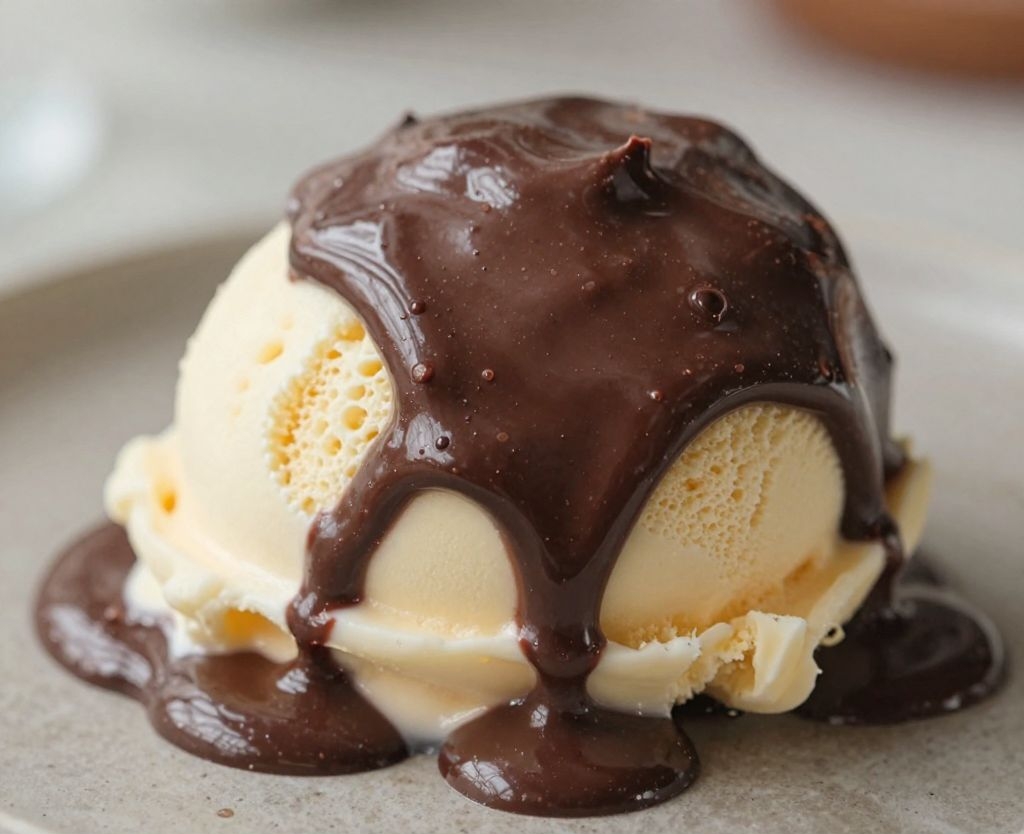

You know that heartbreaking moment when you drizzle hot fudge on a scoop of vanilla bean ice cream, and by the time you sit down, it’s turned into a hard, brittle shell? The kind that shatters instead of oozing? Yeah, I’ve been there too many times.
This recipe fixes that nonsense for good. Spoonable hot fudge that stays soft, glossy, and dangerously easy to eat straight from the jar. No more wrestling with a rock-hard topping. Just pour, scoop, and enjoy that silky, chocolatey goodness all the way to the last bite.
The secret is a simple swap you probably already have in your pantry. And the whole thing comes together in about ten minutes. Let’s get into it.
1. Allergens
This recipe contains dairy and soy (from chocolate chips unless you use dairy-free chocolate). If you need it to be dairy-free, swap the heavy cream for full-fat coconut milk or a rich oat creamer. Use vegan butter instead of regular butter, and pick dairy-free chocolate chips.
It is also gluten-free and nut-free as written. But always check your specific chocolate brand for cross-contamination warnings if those are serious concerns for you.
For a soy-free version, look for chocolate chips made without soy lecithin – many “allergy-friendly” brands exist now.
2. Ingredient notes & substitutions
Heavy cream is your best friend for richness, but half-and-half works too (the sauce will be slightly thinner). Do not use milk – you need that fat to keep the fudge soft. Corn syrup is the hero ingredient here; it prevents crystallization and keeps the texture “spoonable.” You can swap light corn syrup for honey or golden syrup, but the flavor will change subtly.
3. Pro tips
Use a heavy-bottomed saucepan to avoid scorching the chocolate. Nobody wants bitter, burnt fudge. Stir constantly with a silicone spatula – scrape the bottom and corners every few seconds.
Do not boil the mixture aggressively. A gentle simmer is all you need. Boiling can cause the fat to separate and leave you with a greasy mess.
Bring the cream and corn syrup to a simmer first, then pour it over the chopped chocolate. Let it sit for one full minute before stirring. That resting time melts the chocolate gently without seizing.
Finally, add a tiny pinch of flaky sea salt at the end. It won’t make it salty – it just makes the chocolate taste more like itself. Trust me.
4. Storage & make-ahead (fridge/freezer)
Pour the hot fudge into a clean glass jar and let it cool to room temperature, then store it in the fridge for up to three weeks. It will thicken in the fridge but stay soft enough to spoon. To rewarm, just scoop out what you need and microwave for 10–15 seconds.
Yes, you can freeze it too. Transfer to a freezer-safe container and freeze for up to three months. Thaw overnight in the fridge, then stir well. The texture might separate slightly, but a quick whisk brings it right back.
5. Serving suggestions (complete the meal)
This fudge isn’t just for vanilla ice cream, though that’s a classic. Drizzle it over chocolate chip cookie dough ice cream for a double-chocolate overload. Or go bananas – literally – by spooning it over sliced bananas and peanut butter ice cream.
For a full dessert spread, serve it alongside warm brownies, fresh strawberries, and a dollop of whipped cream. Let people build their own sundae bar. It’s also incredible on pancakes, waffles, or a warm croissant (yes, breakfast dessert is a thing).
Want to impress guests? Pour it over a slice of cheesecake and add a sprinkle of crushed pretzels. Sweet, salty, crunchy, gooey – you’re welcome.
6. “Use your leftovers” (reduce waste)
That half-empty jar in the fridge? Stir a spoonful into your morning coffee for a mocha that costs way less than the coffee shop version. Seriously, try it once and you’ll never go back.
Warm it up and use it as a dip for pretzels, graham crackers, or apple slices. It makes a killer after-school snack or a lazy dessert dip. You can also swirl leftovers into yogurt or oatmeal for a chocolate breakfast upgrade.
If you have just a tablespoon left, melt it with a splash of milk and drizzle over popcorn. Sweet & salty popcorn with chocolate fudge? That’s movie night gold. Or freeze small dollops on parchment paper to make fudge “chips” for milkshakes.
7. Common mistakes & how to fix them
Mistake #1: Your fudge turned grainy. That usually means the chocolate got too hot or moisture snuck in. To prevent it, never cover the pot while simmering – condensation drips back in. If it happens anyway, whisk in a tablespoon of warm heavy cream off the heat. Sometimes that smooths it out.
Mistake #2: It’s too thick after refrigerating. That’s normal! Just add a teaspoon of milk or cream and rewarm gently. Stir until it loosens up. Do not microwave on full power for more than ten seconds at a time.
Mistake #3: The sauce separated into oily streaks. You likely boiled it too hard or used chocolate with too low a cocoa butter content. Fix it by whisking in a small spoonful of warm corn syrup and blending with an immersion blender. The emulsion will come back together.
8. Variations by diet or flavor profile
Make it vegan by swapping the heavy cream for canned coconut cream, the butter for coconut oil, and using dairy-free dark chocolate chips. The texture remains luscious and soft. For a salted caramel vibe, add ½ teaspoon of caramel extract and increase the salt to ¼ teaspoon. Kick it up with a pinch of cayenne for a Mexican hot chocolate fudge that’s incredible on cinnamon ice cream.
9. “Why this recipe works” / The science
The magic ingredient is corn syrup (or honey). Sugar wants to crystallize, which creates hard, grainy textures. Corn syrup is an “invert sugar” – it gets in the way of those crystals, keeping the fudge smooth and soft even when cold. Without it, your hot fudge would turn into a chocolate brick in the fridge.
Heavy cream provides the fat that coats the cocoa solids, preventing them from clumping up. That fat also stays semi-solid at fridge temps, so the sauce remains spreadable rather than rock-hard. And the gentle heat from a slow simmer allows the chocolate to melt evenly without breaking its emulsion.
The resting step after pouring hot cream over chocolate is called tempering in chocolate work. It slowly raises the temperature of the cocoa butter, giving you that professional gloss and a silky mouthfeel. Rush this step and you risk dull, grainy fudge.
10. Frequently Asked Questions (FAQ)
Can I use milk chocolate instead of dark? Absolutely, but reduce the sugar in the recipe by half. Milk chocolate is already very sweet. How do I make it thinner for a sauce? Add an extra ¼ cup of cream and warm it before serving. Why did my fudge harden on the ice cream? That means you didn’t use corn syrup or honey, or you might have added too much chocolate. Stick to the ratios here and you’ll get that “stays soft” magic every time.
Can I double this recipe? Yes, but use a larger pot and increase the resting time to two minutes. Stir more frequently to prevent scorching.
11. Call to action
I really want to see your sundae creations! Drop a comment below and tell me your favorite ice cream flavor to pair with this fudge. Do you go classic vanilla, or are you a mint chocolate chip rebel?
If this recipe saved you from another sad, hard topping disaster, share it with a friend who loves ice cream as much as you do. And if you haven’t already, subscribe to my email list – I send out one new recipe every week, no spam, just good food.
Conclusion
So there you go – a hot fudge that actually stays soft, spoonable, and ridiculously chocolatey. No more chipping a tooth on a sad, hardened shell. This stuff stays glossy even straight from the fridge, and it takes almost no effort to make.
Keep a jar in your fridge at all times. Your ice cream (and your pancakes, and your coffee, and your spoon) will thank you. Now go make some fudge and eat half of it before it ever sees a scoop of ice cream. No judgment here.
Recipe Name: Spoonable Hot Fudge That Stays Soft on Ice Cream
Servings: 8 (2 tablespoons per serving)
Estimated Cost Per Serving: $0.45
Prep Time: 5 minutes
Cook Time: 8 minutes
Total Time: 13 minutes
Course: Dessert
Cuisine: American
Calories Per Serving: 165
Diet: Vegetarian (can be vegan or dairy-free with substitutions)
Difficulty: Easy
Ingredients:
- 1/2 cup heavy cream (or full-fat coconut cream for dairy-free)
- 1/4 cup light corn syrup (or honey)
- 2 tablespoons unsalted butter (or vegan butter/coconut oil)
- 1/4 cup granulated sugar
- 1 cup dark chocolate chips (about 6 oz/170g; use dairy-free if needed)
- 1/2 teaspoon vanilla extract
- 1/8 teaspoon fine sea salt
Instructions:
First, chop your chocolate if using a bar, or measure out your chocolate chips. Place them in a heatproof bowl and set aside.
In a small heavy-bottomed saucepan, combine the heavy cream, corn syrup, butter, and sugar. Warm over medium heat, stirring occasionally, until the butter melts and the mixture just begins to simmer. Do not let it boil rapidly.
Pour the hot cream mixture directly over the chocolate chips. Let it sit completely undisturbed for 1 full minute. This resting step is crucial for gentle melting.
After 1 minute, add the vanilla extract and salt. Begin stirring slowly with a silicone spatula, starting from the center and working outward. Stir until the chocolate is fully melted and the mixture is smooth and glossy.
If the fudge looks slightly separated, whisk vigorously for 10 seconds. It should come together into a thick, pourable sauce. Taste and add an extra pinch of salt if you like.
Use immediately over ice cream, or transfer to a glass jar. Let it cool to room temperature before sealing and refrigerating. Rewarm individual portions in the microwave for 10–15 seconds before serving.