

So you finally bought that KitchenAid ice cream maker attachment. And now it’s sitting in the cabinet, judging you every time you reach for the store-bought stuff. Let’s change that today.
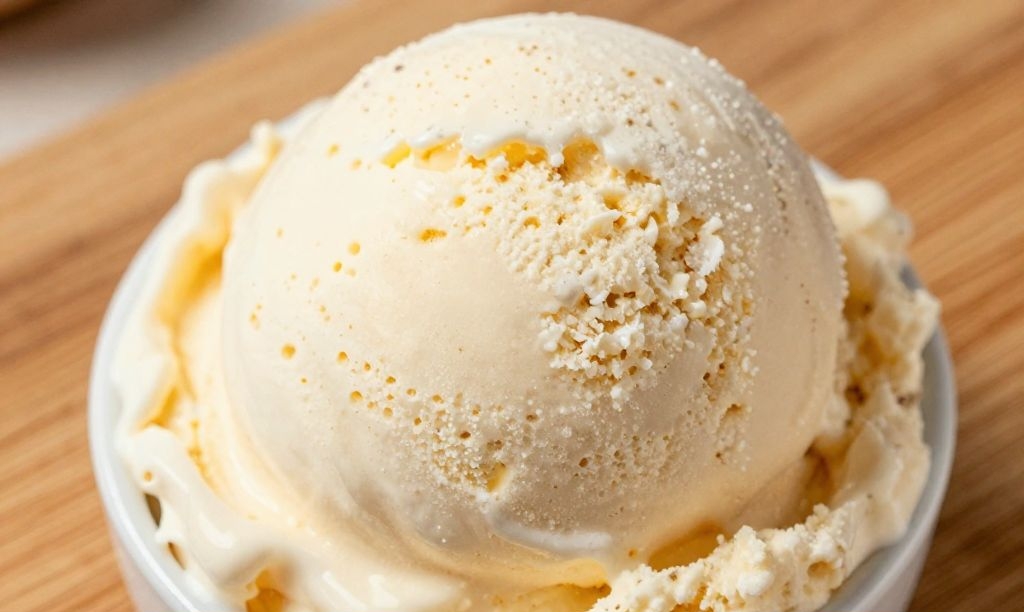
This recipe is the one that’ll make you feel like a genius. We’re talking silky smooth, deeply vanilla-scented ice cream that rivals your favorite creamery. No ice crystals, no weird aftertaste, just pure frozen happiness.
Best part? Your stand mixer does all the heavy churning. You just stir, chill, and pour. Ready to become the dessert hero of your household?
1. Allergens
This classic vanilla ice cream contains milk, cream, and egg yolks. So it’s a triple threat for anyone with dairy or egg allergies. If you’re serving a crowd, make sure to label the container clearly – nobody wants a surprise allergic reaction at the cookout.
Cross-contamination can happen if your KitchenAid bowl or attachment has touched other allergens. Give everything a hot, soapy wash before starting, especially if you’ve made nut-based or gluten-filled treats before.
For a dairy-free option, check section 8 – I’ve got a coconut milk variation that actually works. But for the real deal, assume this is a no-go for vegan, dairy-free, or egg-free diets.
2. Ingredient notes & substitutions
Heavy cream and whole milk are non-negotiable for that silky texture. Don’t swap in low-fat or half-and-half unless you enjoy ice shards. For a lighter version, see the variations below, but accept that it won’t be the same.
3. Pro tips
Chill your ice cream maker bowl for at least 24 hours. I know the manual says 12, but trust me – the longer it freezes, the faster and smoother your churn will be. Give it a shake; if you don’t hear liquid sloshing, you’re golden.
Temper your egg yolks slowly. Pouring hot cream into cold yolks is a recipe for scrambled egg ice cream (gross). Instead, drizzle a ladle of warm cream into the yolks while whisking constantly, then pour it all back.
Don’t skip the fine-mesh strainer. No matter how careful you are, little bits of cooked egg can sneak in. Straining the custard before chilling gives you that professional, velvet texture.
Let the base ripen overnight. After churning, press plastic wrap directly onto the surface of the custard (to stop a skin from forming) and refrigerate it for 8+ hours. The flavors meld and the mixture churns up infinitely smoother.
4. Storage & make-ahead (fridge/freezer)
You can make the custard base up to 3 days in advance. Store it in a sealed container in the fridge, then churn whenever the craving hits. Just give it a good whisk before pouring into the maker.
Once churned, transfer the ice cream to a chilled, airtight container. Press a piece of parchment paper directly on the surface before snapping on the lid – this prevents ice crystals. It’ll keep for 2 months, but let’s be honest, it won’t last that long.
5. Serving suggestions (complete the meal)
Serve this vanilla beauty in a simple bowl with fresh berries and a drizzle of warm fudge. Or go full diner mode and top with salted caramel sauce and crushed waffle cone pieces. Warm brownies on the side are never a bad idea.
For a boozy adult dessert, float a shot of bourbon or amaretto over two scoops. The cold creaminess balances the kick perfectly. Your dinner guests will think you’re a culinary wizard.
Want to impress kids? Make vanilla ice cream sandwiches using soft chocolate chip cookies. Press the ice cream between two cookies, roll the edges in sprinkles, and freeze for 15 minutes. Instant birthday party energy.
This ice cream also shines as a base for milkshakes. Blend 3 scoops with a splash of milk and a spoonful of malt powder. Top with whipped cream and a cherry – you’ve just outdone every drive-thru.
For a low-effort flex, simply scoop it over warm apple pie or peach cobbler. The hot-cold contrast is why dessert exists.
6. “Use your leftovers” (reduce waste)
Made too much custard? Leftover, un-churned base becomes the best French toast batter you’ve ever had. Dip thick slices of brioche, then fry in butter. The vanilla and egg richness is unreal.
Got churned ice cream that’s melting on the counter? Pour it back into a blender with a banana and a spoonful of cocoa powder for a “rescue milkshake.” Nobody will know it wasn’t the plan.
If you have a sad, half-eaten pint in the freezer, turn it into ice cream bread. Yep – mix 2 cups melted vanilla ice cream with 1.5 cups self-rising flour, bake at 350°F for 30 minutes. It’s a weirdly delicious quick bread.
Leftover egg whites (you used yolks for the custard) can become a small batch of meringue cookies or a fluffy angel food cake. Or just scramble them for breakfast – no judgment.
That last scoop stuck to the sides of the maker bowl? Scrape it out and smear it between two graham crackers. Instant ice cream sandwich, no shame required.
And if you somehow have a full quart after a week? Use scoops to cool down hot coffee – affogato style. Pour espresso over a scoop, and you’re suddenly Italian.
7. Common mistakes & how to fix them
Ice crystals mean your bowl wasn’t cold enough. Next time, freeze the bowl for a full 24 hours. For now, let the ice cream soften 10 minutes on the counter, then give it a vigorous stir before scooping.
Grainy texture usually comes from scrambled eggs. You heated the cream too fast or didn’t temper. The fix? Always strain the custard – you can’t un-scramble, but you can filter out the lumps.
Ice cream that’s too hard to scoop means you used too much sugar or not enough air. Make sure your KitchenAid churns for at least 20-25 minutes until it looks like soft serve. Then freeze in a shallow, wide container for easier scooping later.
8. Variations by diet or flavor profile
Dairy-free version: Replace the heavy cream with full-fat coconut cream and the milk with unsweetened oat milk. Omit the egg yolks (they’re not safe raw anyway) and add 2 tbsp cornstarch to the base for body. Churn as usual – it’ll be coconutty but delicious.
9. “Why this recipe works” / The science
Egg yolks are natural emulsifiers. They bind the fat and water together so you don’t get icy separation. That’s why a custard base (with yolks) is infinitely creamier than a Philadelphia-style (no eggs). Science for the win.
The slow chilling step before churning matters more than you think. When the custard rests overnight, fat molecules cluster in a way that traps less air. That sounds bad, but less air means denser, silkier ice cream that melts slowly on your tongue.
Your KitchenAid maker works by scraping frozen custard off the sides of the super-cold bowl. If the bowl isn’t frozen solid, it can’t freeze quickly enough, and you get big ice crystals. That’s why the 24-hour freeze is non-negotiable.
Sugar isn’t just for sweetness – it lowers the freezing point. That’s why homemade ice cream stays scoopable straight from the freezer. Too little sugar, and you’ll need a jackhammer. Too much, and it never freezes solid. This recipe hits the sweet spot.
10. Frequently Asked Questions (FAQ)
Can I use a different ice cream maker? Yes, but adjust churning time based on your machine’s manual. The ingredient ratios work for any standard home maker. Just don’t over-churn or you’ll get butter.
Why does my ice cream taste eggy? You either used too many yolks (stick to 5) or didn’t cook the custard enough to take off the raw edge. Heat to 170°F on a thermometer – that’s the sweet spot between cooked and curdled.
11. Call to action (comment, share, subscribe)
If you make this silky smooth vanilla ice cream, drop a comment below – tell me what toppings you used or if you tried the coconut variation. I read every single one and reply with my terrible puns.
Snap a photo and tag me on Pinterest or Instagram (links in sidebar). Nothing makes my day like seeing your KitchenAid in action with a gorgeous bowl of homemade ice cream.
Know a friend who bought the ice cream attachment and never used it? Share this recipe with them – be the reason their dusty bowl finally gets some love.
Subscribe to the newsletter (pop-up form is harmless, I promise) and I’ll send you my 5 most common ice cream rescues as a free PDF. Because we’ve all had a melty disaster.
And hey – if you hated this recipe? Okay, tell me that too. I can take it. Just be nice, I’m sensitive about my frozen dairy offspring.
Now go forth and churn.
Conclusion
That’s it – you’re officially an ice cream maker. No more settling for freezer-burned tubs or mystery ingredients. This vanilla custard is your new party trick, and it costs less than a fancy pint.
One last nudge: don’t overthink it. The first batch might be a little soft, the second batch might vanish before you freeze it. That’s the joy of homemade. You’ve got this.
Now get that KitchenAid bowl out of the freezer and show it who’s boss. And please, for the love of sprinkles, come back and tell me how it went.
Recipe Name: Silky Smooth Vanilla Ice Cream – KitchenAid Maker Recipe
Servings: 6 (makes about 1.5 quarts)
Estimated Cost Per Serving: $1.20
Prep Time: 20 minutes
Cook Time: 15 minutes (plus chilling and freezing time)
Total Time: 8+ hours (mostly inactive)
Course: Dessert
Cuisine: American
Calories Per Serving: 420
Diet: Vegetarian (contains dairy & eggs)
Difficulty: Medium
Ingredients
- 2 cups (480 ml) heavy cream
- 1 cup (240 ml) whole milk
- ¾ cup (150 g) granulated sugar
- Pinch of fine sea salt
- 5 large egg yolks
- 1 tablespoon (15 ml) pure vanilla extract (or 1 vanilla bean, scraped)
Instructions
First, freeze your KitchenAid ice cream maker bowl for at least 24 hours. No shortcuts here – give it a shake; if you hear liquid, it’s not ready.
In a medium saucepan, combine the heavy cream, whole milk, half of the sugar (about 6 tablespoons), and the salt. Warm over medium heat, stirring occasionally, until you see small bubbles around the edge – do not boil.
While the cream heats, whisk the egg yolks with the remaining sugar in a separate bowl until pale and slightly thickened, about 2 minutes.
When the cream mixture is hot, slowly pour about 1 cup of it into the egg yolk mixture while whisking constantly. This tempers the yolks so they don’t scramble. Then pour the yolk mixture back into the saucepan.
Cook the custard over medium-low heat, stirring constantly with a silicone spatula, until it thickens slightly and coats the back of a spoon (about 170°F on a thermometer). Do not let it simmer or boil.
Immediately pour the custard through a fine-mesh strainer into a clean bowl. Stir in the vanilla extract (or scrape in vanilla bean seeds). Let it cool for 15 minutes at room temperature, then press plastic wrap directly onto the surface to prevent a skin. Refrigerate for at least 4 hours, but overnight is much better.
Once the custard is thoroughly chilled and your ice cream bowl is frozen solid, attach the bowl and the dasher to your KitchenAid stand mixer. Turn to the “stir” setting and pour the custard through the opening. Let it churn for 20-25 minutes until it looks like soft-serve ice cream.
Transfer the churned ice cream to a chilled, airtight container. Press a piece of parchment paper directly on the surface, then seal with the lid. Freeze for at least 4 hours to firm up before serving. For the best scoopable texture, let it sit at room temperature for 5-10 minutes before digging in.