
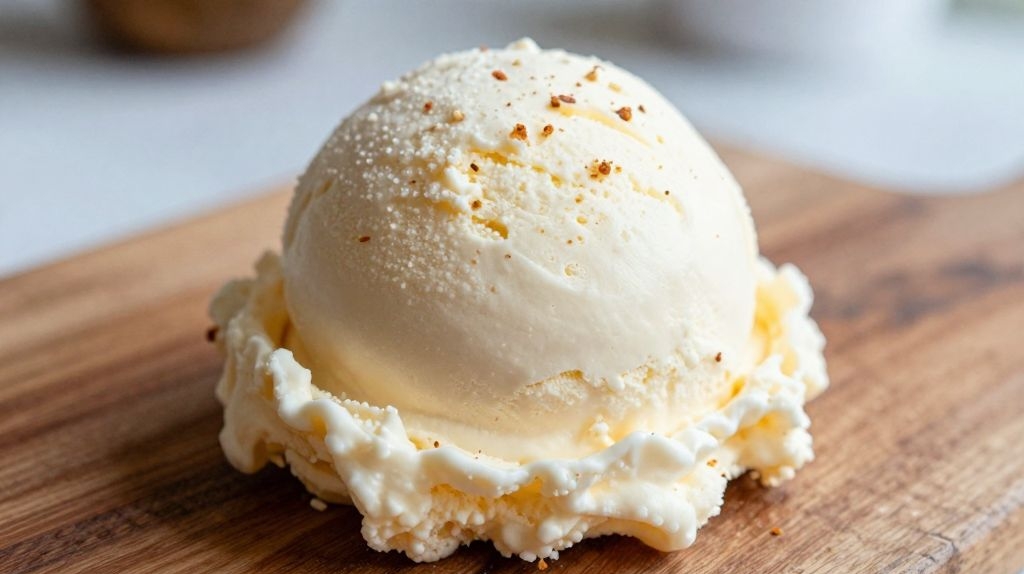

You know that sad, rock-hard brick of “keto” ice cream from the store? The one that chips your tooth and requires a blowtorch to scoop? Yeah, we’re not doing that today.
This homemade version is silky-smooth, spoonable right from the freezer, and has that glorious soft-serve feel you thought you gave up forever. No ice crystals, no weird aftertaste—just creamy, dreamy keto magic.
Grab your blender and a loaf pan. Let’s break some rules (and zero carbs).
1. Allergens
This recipe contains dairy (heavy cream, cream cheese) and eggs. If you need a dairy-free version, check Variation #8 below—coconut cream works beautifully.
It is naturally gluten-free and nut-free as written, but always double-check your sweetener and cream cheese labels for hidden additives. Cross-contamination happens, so buy certified if you’re highly sensitive.
2. Ingredient notes & substitutions
Heavy cream is non-negotiable for that soft-serve texture—half-and-half will turn into an ice block. For the cream cheese, use full-fat brick style (not whipped tubs, which add air and stabilizers).
Sweetener matters more than you think. Allulose is your best friend here because it lowers the freezing point, keeping the ice cream scoopable. Erythritol alone will crystallize, so blend it 50/50 with allulose or add a teaspoon of vegetable glycerin.
3. Pro tips
Chill your bowl and beaters in the freezer for 15 minutes before whipping—this cuts churning time in half. When you cook the custard, don’t let it simmer or you’ll get scrambled eggs. Stir constantly over low heat until it coats the back of a spoon.
Pour the mixture through a fine-mesh strainer even if you don’t see lumps. Trust me, that one rogue bit of cooked egg will ruin the silkiness. Then refrigerate the base for at least 4 hours (overnight is better) before churning.
4. Storage & make-ahead (fridge/freezer)
Store the finished ice cream in a shallow airtight container with a piece of plastic wrap pressed directly onto the surface—this prevents ice crystals. It will keep for up to 2 weeks in the freezer, but the texture is best in the first 5 days.
You can make the custard base up to 3 days ahead and keep it in the fridge. Just give it a good whisk before churning. For longer storage, scoop into individual silicone muffin cups, freeze solid, then pop them out into a zip bag for single-serving “pucks.”
5. Serving suggestions (complete the meal)
Scoop this into a chilled bowl and top with toasted coconut flakes, a drizzle of sugar-free chocolate sauce, or a sprinkle of cinnamon. It also makes a killer “milkshake” with a splash of unsweetened almond milk in a blender.
Pair it with a warm keto brownie or a handful of fresh berries. For a fancy dessert, serve two scoops alongside a shot of espresso—keto affogato, anyone?
6. “Use your leftovers” (reduce waste)
If you have leftover custard that won’t fit in your ice cream maker (or you don’t own one), pour it into popsicle molds for creamy keto fudgsicles. Add a tablespoon of cocoa powder to the leftover base and re-blend.
That extra cream cheese from the brick? Spread it on celery or mix it into scrambled eggs. Leftover egg whites (from the yolks you used here) make fantastic keto meringue cookies or a protein-packed omelet.
7. Common mistakes & how to fix them
Grainy texture means your sweetener crystallized—next time, grind erythritol into powder form or switch to allulose. For a quick fix, reheat the base gently, add a teaspoon of vodka (alcohol prevents crystals), then re-churn.
Ice crystals on top happen when you didn’t press plastic wrap onto the surface. Scrape off the crunchy layer and enjoy the creamy part underneath—then remember the wrap trick for next time. Too hard to scoop means you used too much erythritol. Let the ice cream sit on the counter for 10 minutes before serving.
8. Variations by diet or flavor profile
Dairy-free: Swap heavy cream for full-fat coconut cream (chilled, solids only) and cream cheese for 2 tablespoons of coconut butter. The texture will be slightly less rich but still luscious.
Chocolate chunk: After churning, fold in 1/4 cup of finely chopped 90% dark chocolate. Mint chip: Add 1/2 teaspoon of peppermint extract and a drop of green food coloring (optional). Peanut butter swirl: Warm 2 tablespoons of natural peanut butter until runny, then swirl it into the ice cream before freezing.
9. “Why this recipe works” / The science
The cream cheese acts as an emulsifier, trapping tiny air bubbles and preventing large ice crystals. Egg yolks add lecithin, which binds fat and water so they don’t separate into a gritty mess.
Allulose is the secret weapon—it doesn’t crystallize like erythritol and lowers the freezing point by about 5 degrees. That’s why you get soft-serve feel instead of a brick. The vodka in the pro tip works the same way (alcohol never freezes), but allulose does it naturally and tastes better.
10. Frequently Asked Questions (FAQ)
Can I make this without an ice cream maker? Yes, but it takes more effort. Pour the chilled base into a metal loaf pan, freeze for 30 minutes, then scrape it with a fork every 30 minutes for 3 hours until fluffy. That’s the “no-churn” method and it works great.
Why is my ice cream too sweet? Sweeteners vary in intensity. Allulose is about 70% as sweet as sugar, so if you used erythritol (which is equal to sugar), cut the amount by 25% next time. Can I use stevia? You can, but liquid stevia doesn’t bulk up the texture—add 1/4 cup of allulose anyway for body.
11. Call to action (comment, share, subscribe)
Have you struggled with icy “keto ice cream” before? Drop a comment below—I read every single one and love hearing your wins (and epic fails). If this recipe saved your summer, share it with a keto buddy who needs a scoop of happiness.
Click that subscribe button for more low-carb desserts that don’t taste like cardboard. Next week we’re tackling no-churn vanilla that sets in 20 minutes.
Now that we’ve chatted through all the tricks, here’s the actual recipe. Make it once, and you’ll never buy store-bought again.
Recipe Name: Silky-Smooth Keto Ice Cream with a Soft-Serve Feel
Servings: 6
Estimated Cost Per Serving: $1.85
Prep Time: 15 minutes
Cook Time: 10 minutes
Total Time: 4 hours 25 minutes (includes chilling)
Course: Dessert
Cuisine: American
Calories Per Serving: 320
Diet: Keto, Gluten-Free
Difficulty: Easy
Ingredients
- 1 ½ cups heavy cream (360 ml)
- 4 large egg yolks
- 2 oz full-fat cream cheese, softened (56 g)
- ½ cup allulose sweetener (80 g)
- ¼ cup powdered erythritol (optional, for extra sweetness – skip if you prefer less sweet)
- 1 teaspoon vanilla extract
- Pinch of sea salt
Instructions
First, whisk the egg yolks in a small bowl. In a saucepan over medium-low heat, combine the heavy cream, allulose, and salt. Stir until the sweetener dissolves and the cream is warm (not boiling).
Temper the yolks by slowly drizzling ½ cup of the warm cream into the yolks while whisking constantly. Then pour the yolk mixture back into the saucepan. Cook over low heat, stirring constantly with a rubber spatula, for 5–7 minutes until the custard thickens enough to coat the back of a spoon.
Remove from heat and immediately whisk in the cream cheese and vanilla extract until completely smooth. Pour the custard through a fine-mesh strainer into a bowl. Let it cool to room temperature, then cover and refrigerate for at least 4 hours (overnight is ideal).
Once chilled, churn the base in your ice cream maker according to the manufacturer’s instructions (about 20–25 minutes). The mixture will look like soft-serve. Transfer it to a shallow container, press plastic wrap directly onto the surface, and freeze for 1–2 hours to firm up slightly.
To serve, let the ice cream sit at room temperature for 5–10 minutes for that perfect soft-serve feel. Scoop and enjoy your victory over rock-hard keto desserts.