
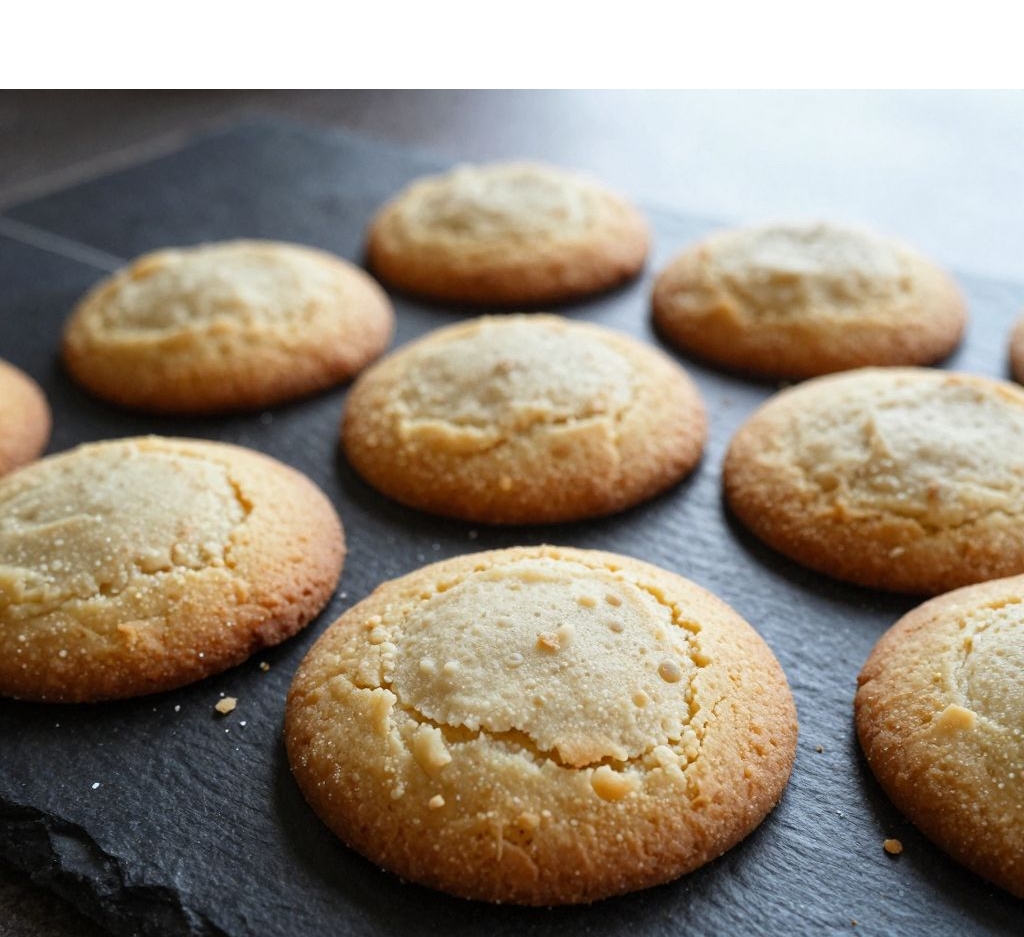

You know that one cookie on the holiday tray that everyone fights over? The one that’s so soft it practically melts, with a buttery flavor that lingers long after it’s gone. This is that cookie.
I’ve spent years chasing the perfect Christmas cookie—one that doesn’t turn into a dry, crumbly mess or a sad, flat pancake. After too many baking fails (we don’t talk about the Great Gingerbread Disaster of ’19), I finally landed on this recipe.
It’s stupidly easy, uses basic pantry staples, and will make you look like a holiday hero. Ready? Let’s bake.
1. Allergens
This recipe contains dairy (butter), eggs, and gluten (all-purpose flour). If you’re baking for a crowd with allergies, you need to be upfront about these.
Nuts are not in the base recipe, but always check your extracts and sprinkles for cross-contamination. Some vanilla extracts or festive decorations hide nut oils.
For a dairy-free version, use vegan butter sticks (like Miyoko’s or Earth Balance) and a plant-based milk for the glaze. Egg allergies can be tricky here because eggs provide structure and softness—try a flax egg (1 tbsp ground flax + 3 tbsp water per egg), but expect a slightly denser cookie.
Gluten-free? Swap the all-purpose flour for a cup-for-cup gluten-free blend that contains xanthan gum. King Arthur’s works beautifully. Just don’t overmix.
2. Ingredient notes & substitutions
Unsalted butter is non-negotiable here—salted butter throws off the balance and can make your cookies taste like a salt lick. If you only have salted, reduce the added salt to a pinch.
Cream cheese (yes, really!) is my secret weapon. Just two ounces make the dough impossibly tender without tasting cheesy. Substitute with sour cream or Greek yogurt if you’re in a pinch, but cream cheese gives the best texture.
3. Pro tips
Chill the dough for at least two hours. I know, waiting is torture. But cold fat = less spreading = those beautiful, sharp-edged cookies you see on Pinterest.
Roll between parchment paper instead of flouring your counter. That extra flour makes cookies tough. Just sandwich the dough, roll to ¼-inch thickness, then peel and cut.
Use a bench scraper to transfer cut shapes to the baking sheet. Your fingers will warm the dough and ruin the chill. Ask me how I know (cries in misshapen snowmen).
Bake one sheet at a time in the middle rack. Rotate halfway through for even browning. If you crowd two sheets, the bottom ones will over-bake while the top ones look pale.
Let cookies cool completely on the sheet for 5 minutes before moving to a wire rack. They’re super soft when hot and will crumble if you poke them too soon.
4. Storage & make-ahead (fridge/freezer)
To store baked cookies: Keep them in an airtight container at room temperature for up to a week. Separate layers with parchment paper if you’ve added icing.
To freeze baked cookies: Arrange un-iced cookies in a single layer on a baking sheet, freeze until solid, then transfer to a freezer bag. They’ll last three months. Just thaw and decorate when you’re ready.
To freeze the dough: Wrap the disc tightly in plastic wrap, then foil. Frozen dough keeps for three months. Thaw overnight in the fridge before rolling.
Make-ahead tip: You can prep the dough up to three days in advance. Keep it wrapped in the fridge, and let it sit at room temperature for 10 minutes before rolling.
Need unbaked cut-outs on standby? Cut the shapes, place them on a parchment-lined sheet, freeze until hard, then stack between parchment in a bag. Bake straight from frozen—add 2 minutes to the bake time.
Royal icing or glaze? Store iced cookies in a single layer at room temperature. Never refrigerate decorated cookies—the condensation will make the icing runny and weird.
5. Serving suggestions
Pile these onto your holiday tray alongside gingerbread men, peppermint bark, and chocolate crinkle cookies. The buttery softness is a perfect contrast to crunchy biscotti or crispy spiced nuts.
Pair with warm drinks like mulled wine, eggnog, or a simple hot cocoa. For a non-alcoholic option, spiced apple cider makes the butter flavor sing.
Want to go full extra? Set up a cookie decorating station with colored royal icing, sprinkles, and edible glitter. Let guests personalize their own snowflakes and trees—it’s a crowd-pleaser for kids and adults alike.
6. Use your leftovers
Scraps from re-rolling dough? Don’t trash them. Gather all the scraps, gently press them together (don’t knead or overwork), and re-roll once. You’ll get another half-batch of cookies.
Crumbled leftover cookies become an amazing ice cream topping or cheesecake crust. Just blitz them in a food processor with a little melted butter, press into a pan, and bake.
7. Common mistakes & how to fix them
Your cookies spread into sad puddles. That means your dough wasn’t cold enough, or you over-softened the butter. Solution: Chill the cut shapes on the sheet for 15 minutes before baking.
They taste like flour. You used too much flour when rolling. Next time, roll between parchment. For this batch, dust off excess flour with a dry pastry brush before baking.
The bottoms are burnt but tops are pale. Your oven runs hot, or the rack is too low. Invest in an oven thermometer—most ovens lie. Also, use a light-colored baking sheet; dark pans absorb more heat.
They’re dry and crumbly. You overmixed the dough after adding flour. Gluten developed and made everything tough. For this batch, crumble them over yogurt or pudding. Next time, mix just until the flour disappears.
8. Variations by diet or flavor profile
Vegan version: Swap butter for vegan butter sticks, cream cheese for a vegan cream cheese (Tofutti works), and use a flax egg. For the glaze, use powdered sugar and non-dairy milk.
Lemon-raspberry twist: Add 1 tbsp lemon zest and ½ tsp raspberry extract to the dough. Replace the vanilla glaze with a lemon juice + powdered sugar drizzle and sprinkle freeze-dried raspberry dust on top.
9. Why this recipe works
The cream cheese adds acidity and fat, which shortens gluten strands and creates that ultra-tender, almost cake-like crumb. It also helps the dough hold its shape during baking.
Chilling does double duty: It solidifies the butter so the cookies don’t spread, and it allows the flour to fully hydrate, which improves flavor and texture. Science for the win.
Powdered sugar instead of granulated in the dough? Yep. Granulated sugar creates sharp, crispy edges (great for biscotti), but powdered sugar melts into the butter and cream cheese, giving you that soft, sandy texture that melts on your tongue.
The ratio of butter to flour is dialed to 1:2.5 by volume—enough fat for richness but enough flour for structure. Too much butter = flat greasy pucks. Too much flour = dry cardboard.
Baking at 350°F (not 375°F) gives the cookies time to set before the edges brown. Higher temps work for crispy cookies, but low and slow keeps them soft.
10. Frequently Asked Questions (FAQ)
Can I use margarine instead of butter? You can, but the cookies will be softer and spread more. Margarine has more water and less fat. I’d stick with butter for the best texture.
Why did my dough crack when I rolled it? The dough was too cold or too dry. Let it sit at room temperature for 10 minutes. If it’s still cracking, knead in one teaspoon of milk at a time until it comes together.
Do I have to add cream cheese? No, but you’ll lose that signature tenderness. Without it, you’ll have a standard sugar cookie—still tasty, but not as “buttery soft.”
How do I get perfectly even thickness? Use rolling pin rings or two chopsticks on either side of the dough. Place them under your rolling pin, and it’s impossible to roll thinner than ¼ inch.
Can I double this recipe? Absolutely. Just don’t double the chilling time—still two hours minimum. Work in batches because your mixer might struggle with double the dough.
My icing is too runny. Add more powdered sugar, one tablespoon at a time. Too thick? Add a drop of milk. The perfect consistency is when a knife drawn through the icing leaves a line that fills in after 5 seconds.
11. Call to action
I’d love to see your holiday trays! Snap a photo of these cookies and tag me on Instagram @yourblogname – I reshare every single one.
Ran into a problem? Drop a comment below. I answer every question within 24 hours (unless I’m elbow-deep in cookie dough myself).
Don’t lose this recipe. Pin the image above or subscribe to my newsletter for a free printable holiday baking checklist. You’ll get new recipes every Tuesday, no spam, just butter and flour.
Conclusion
These buttery, soft Christmas cookies are the showstopper your holiday tray deserves. They’re forgiving enough for a lazy Sunday bake session but impressive enough to gift to your picky mother-in-law.
So go ahead—make a double batch. Freeze half. Eat the ugly ones straight off the pan while they’re still warm. That’s the real holiday spirit.
Now get in that kitchen and preheat your oven. Your cookie tray is waiting.
Recipe Name: Buttery Soft Christmas Cut-Out Cookies
Servings: 24 cookies (2 cookies per serving = 12 servings)
Estimated Cost Per Serving: $0.45
Prep Time: 20 minutes
Cook Time: 10 minutes
Total Time: 30 minutes (plus 2 hours chilling)
Course: Dessert
Cuisine: American
Calories Per Serving: 175
Diet: Vegetarian
Difficulty: Easy
Ingredients
For the cookies:
- 1 cup (226g) unsalted butter, softened
- 4 oz (113g) cream cheese, softened
- 1 cup (120g) powdered sugar
- 1 large egg yolk (save the white for another use)
- 1 tsp vanilla extract
- ½ tsp almond extract (optional, but so good)
- ½ tsp salt
- 2 ½ cups (310g) all-purpose flour
For the glaze (optional):
- 1 cup (120g) powdered sugar
- 2–3 tbsp milk or heavy cream
- ½ tsp vanilla extract
- Sprinkles, sanding sugar, or edible glitter
Instructions
First, in a large bowl or stand mixer with paddle attachment, beat the softened butter and cream cheese together on medium speed until smooth and creamy—about 2 minutes. Scrape down the sides.
Add the powdered sugar and beat until light and fluffy, another minute. Then mix in the egg yolk, vanilla extract, almond extract (if using), and salt.
Turn the mixer to low and gradually add the flour. Mix just until the dough comes together. Do not overmix—stop when you no longer see dry flour.
Divide the dough into two equal discs. Wrap each in plastic wrap and refrigerate for at least 2 hours, or up to 3 days. (This step is mandatory. Put on a movie. Don’t skip it.)
When you’re ready to bake, preheat your oven to 350°F (175°C). Line two baking sheets with parchment paper.
Remove one dough disc from the fridge. Let it sit for 5–10 minutes to soften slightly. Place it between two sheets of parchment paper and roll to ¼-inch thickness.
Peel off the top parchment. Use your favorite Christmas cookie cutters (stars, trees, snowflakes) to cut out shapes. Transfer them to the prepared baking sheet, spacing about 1 inch apart.
Gather scraps, press gently together, re-roll once, and cut more cookies. Repeat with the second dough disc.
For best results, chill the cut shapes on the baking sheet for 15 minutes before baking. This prevents spreading.
Bake one sheet at a time on the middle rack for 8–10 minutes, until the edges are just barely golden. The centers will look soft—that’s perfect.
Let cookies cool on the baking sheet for 5 minutes, then transfer to a wire rack to cool completely.
To make the glaze, whisk together powdered sugar, 2 tbsp milk, and vanilla. Add more milk ½ tsp at a time until you reach a thick but pourable consistency.
Dip the tops of cooled cookies into the glaze or drizzle with a spoon. Add sprinkles immediately before the glaze sets. Let dry for 1 hour.
Store in an airtight container at room temperature for up to a week. Or freeze unglazed cookies for up to 3 months.