

You know that sinking feeling when your fudge turns into a gritty, sandy disappointment? I’ve been there – more times than I care to count. After a few holiday meltdowns (literal and emotional), I finally figured out what actually works.
This recipe is the one I wish I had a decade ago. No crystals, no weird textures, just perfect, creamy fudge that melts in your mouth every single time.
The best part? You only need five minutes of active work and a handful of ingredients. Let’s banish grainy fudge for good.
1. Allergens
This fudge contains dairy (butter and sweetened condensed milk) and soy (most chocolate chips contain soy lecithin). If you need a dairy-free or soy-free version, check section 8 for substitutions.
Tree nuts are not in the base recipe, but many chocolate brands process nuts on shared equipment. Always read labels if cross-contamination is a concern for you.
The recipe is naturally gluten-free as written. No flour or gluten-containing ingredients go anywhere near this pan.
For egg allergies, you’re safe – there are no eggs in traditional fudge. Just be cautious with any flavored add-ins like cookie pieces or nut butters.
2. Ingredient notes & substitutions
Use full-fat sweetened condensed milk, not evaporated milk. Evaporated milk lacks the sugar and thickness, so your fudge will never set properly. Low-fat condensed milk also leads to a softer, sometimes grainy result.
Semi-sweet chocolate chips work best for classic fudge, but you can swap in dark, milk, or white chocolate. Avoid chocolate bars with high cocoa butter content (like baking chocolate) – they can cause seizing. For a dairy-free version, use vegan butter and sweetened condensed coconut milk.
3. Pro tips
Invest in a candy thermometer. I know, it sounds fancy, but it’s the single biggest reason homemade fudge fails. You’re aiming for 234°F to 240°F (soft-ball stage) – that’s the sweet spot where sugar crystals stay small and smooth.
Never stir the mixture once the sugar dissolves and it starts boiling. Stirring introduces rogue crystals that turn your fudge into sandpaper. Swirl the pan gently if needed, but keep that spoon out.
Line your pan with parchment paper with overhang on two sides. This lets you lift the whole block out for clean, easy cutting. Greasing alone often ends in a sticky mess.
Let the fudge cool undisturbed on the counter for 10 minutes, then beat it vigorously with a wooden spoon exactly until it thickens and loses its shine. Over-beating creates graininess; under-beating gives you a gooey, unset slab.
Use a heavy-bottomed saucepan to prevent hot spots. Thin pans scorch the milk and chocolate, which introduces bitter flavors and weird textures.
4. Storage & make-ahead
Once the fudge is fully set (about 2 hours at room temperature or 1 hour in the fridge), cut it into squares. Store in an airtight container with parchment between layers to prevent sticking.
In the fridge, this fudge stays perfect for up to two weeks. The cool temperature keeps it firm but still creamy. Let it sit at room temperature for 5 minutes before serving if you want that melt-in-your-mouth feel.
For longer storage, freeze the fudge for up to three months. Wrap individual pieces in plastic wrap, then place them in a freezer-safe bag or container. Squeeze out as much air as possible.
To thaw, move the container to the fridge overnight. You can also eat it straight from the freezer – it’s like fudge candy. Just be prepared for a very solid bite.
Make this fudge up to a month ahead for holidays or gifting. No one will ever know it wasn’t made that morning. Just keep it away from strong-smelling foods in the fridge (onions and fudge are not friends).
Pro tip: Double the batch and freeze half. You’ll thank yourself when unexpected guests show up or a chocolate craving hits at 10 p.m.
5. Serving suggestions
Serve these little squares alongside a hot cup of black coffee or espresso. The bitter coffee cuts through the sweetness perfectly. Or go full indulgence with a scoop of vanilla bean ice cream and a drizzle of warm caramel.
Crush a few pieces over chocolate pudding, brownies, or even your morning oatmeal. Yes, oatmeal. Don’t knock it until you’ve tried it. For a party platter, arrange fudge bites with fresh berries, shortbread cookies, and salty pretzels for contrast.
6. Use your leftovers
Leftover fudge? That’s hilarious – but if you somehow have extra, chop it into small chunks and fold into cookie dough or brownie batter for double-chocolate chaos.
7. Common mistakes & how to fix them
Grainy fudge means you either stirred during boiling or your temperature spiked too fast. There’s no fixing it after the fact, but you can melt it back down with a few tablespoons of heavy cream and re-cook it carefully. The texture won’t be perfect, but it’ll be edible.
If your fudge never set and stays soupy, you didn’t cook it to a high enough temperature. Scrape it back into the pot, add a tablespoon of corn syrup (to inhibit crystals), and bring it to 238°F again. This usually saves the batch.
Hard, crumbly fudge means you overcooked it past 240°F. You can try pulsing it in a food processor and using the crumbs as an ice cream topping or cheesecake crust. Next time, watch that thermometer like a hawk.
White streaks or a dull surface happen when you beat the mixture for too long after cooling. Unfortunately, that’s a cosmetic issue – it still tastes fine, but it’s not winning any beauty contests. Just hide the streaks under a drizzle of melted chocolate.
8. Variations by diet or flavor profile
Vegan foolproof fudge: Use canned sweetened condensed coconut milk (like Nature’s Charm or a homemade version), plant-based butter, and vegan chocolate chips. The process is identical. Gluten-free? You’re already good to go – just verify your chocolate is GF-certified.
For flavor twists, stir in 1/2 teaspoon of peppermint extract after removing from heat, then top with crushed candy canes. Or add 1/4 cup of smooth peanut butter and 1/2 teaspoon of salt for a salty-sweet peanut butter fudge. Espresso powder (1 tablespoon) makes a mocha version that coffee lovers will fight over.
9. Why this recipe works / The science
Fudge is essentially a sugar syrup that you intentionally seed with tiny crystals – but only the right amount. When you cook sugar, milk, and chocolate to the soft-ball stage (234-240°F), you create a supersaturated solution that wants to crystallize.
The secret is controlling when and how those crystals form. By not stirring while boiling, you prevent premature crystal growth. Then the fat from butter and chocolate coats the sugar molecules, slowing everything down and keeping crystals microscopic.
After the initial cooling, you beat the mixture just enough to create a smooth, creamy network of tiny crystals. Beat too little and it’s syrupy; beat too much and you get large, gritty crystals. This recipe’s timing and temperatures are calibrated to hit that sweet spot every time.
Sweetened condensed milk is the real hero. It already has sugar dissolved in a small amount of water, with milk proteins and fats that interfere with crystal formation. That’s why this method is so much more forgiving than old-fashioned granulated-sugar fudge.
Adding butter at the end introduces more fat, which shortens the crystal chains and gives you that melt-in-your-mouth texture. No fat equals rock candy – and nobody wants rock candy fudge.
10. Frequently Asked Questions (FAQ)
Can I use a microwave instead of a stovetop? Technically yes, but I don’t recommend it. Microwaves heat unevenly, making it much harder to hit the exact temperature without scorching or graininess. Stick to a heavy pot and a thermometer.
Why is my fudge oily? That usually happens when the chocolate gets too hot or you use chocolate with a very high cocoa butter content (like cheap baking chips). Lower your heat next time and stir gently during melting before adding the condensed milk.
How do I know when it’s done beating? The mixture will change from shiny and fluid to matte and thick, almost like a soft dough pulling away from the sides of the pan. This takes about 1 to 2 minutes of vigorous stirring with a wooden spoon.
Can I double this recipe? Absolutely. Use a larger pot (at least 5 quarts) and expect the cooking time to increase by 5-7 minutes. The temperature target stays the same. Do not double in a standard saucepan – it’ll boil over and make a sticky disaster on your stove.
What’s the best chocolate brand for fudge? Guittard, Ghirardelli, or Enjoy Life (for allergy-friendly) all work beautifully. Avoid store-brand chocolate chips that contain stabilizers like polyglycerol polyricinoleate (PGPR) – they mess with the crystal structure.
My fudge has bubbles on top – what went wrong? You beat it a little too enthusiastically and incorporated air. It’s still perfectly fine to eat. Just smooth the top with a spatula while it’s still warm, or hide the bubbles under sprinkles or sea salt.
11. Call to action
Okay, now it’s your turn. Make this fudge exactly once, and you’ll never go back to grainy, temperamental recipes again. I promise that first creamy bite will make you feel like a kitchen wizard.
Drop a comment below and let me know how it turned out – did you try a flavor variation? Did you give it as a gift? I read every single comment, and your wins (and funny fails) keep me going.
If this recipe saved your holiday baking or just made a Tuesday afternoon better, share it with a friend who needs some fudge therapy. And subscribe to the email list so you never miss another foolproof dessert.
So here’s the deal: you follow these steps, keep that spoon out of the boiling syrup, and trust the thermometer. In less than two hours, you’ll have a pan of the creamiest, most reliable fudge you’ve ever made.
Give a few squares away (or don’t – I won’t judge). Just promise me you’ll never suffer through gritty fudge again. Now go preheat that stove – well, not preheat, but you know what I mean. Get that pot ready.
Recipe Name: Never Grainy Again Foolproof Fudge
Servings: 16 (1-inch squares)
Estimated Cost Per Serving: $0.65
Prep Time: 5 minutes
Cook Time: 10 minutes
Total Time: 2 hours (includes setting)
Course: Dessert
Cuisine: American
Calories Per Serving: 210
Diet: Gluten-Free (contains dairy and soy unless modified)
Difficulty: Easy
Ingredients
- 3 cups (510g) semi-sweet chocolate chips (or chopped chocolate)
- 1 can (14 oz / 397g) sweetened condensed milk (full-fat)
- 4 tablespoons (56g) unsalted butter, cut into pieces
- 1 teaspoon vanilla extract
- 1/4 teaspoon fine sea salt (optional, but recommended)
Instructions
First, line an 8×8-inch baking pan with parchment paper, leaving overhang on two opposite sides. This will let you lift the fudge out later.
Combine the chocolate chips, sweetened condensed milk, and butter in a heavy-bottomed saucepan. Cook over medium-low heat, stirring constantly with a silicone spatula, until everything is melted and smooth – about 3 to 4 minutes. Do not let it boil at this stage.
Attach a candy thermometer to the side of the pan. Increase heat to medium and bring the mixture to a gentle boil. Stop stirring completely once it starts boiling. Let it boil until the thermometer reads 238°F (114°C). This takes about 5 to 7 minutes. Watch closely – every stove is different.
Remove the pan from heat immediately. Stir in the vanilla extract and sea salt (if using). Let the mixture cool undisturbed for 10 minutes. The temperature will drop to about 120°F.
Now grab a wooden spoon and beat the fudge vigorously for 1 to 2 minutes. Beat until it thickens, loses its gloss, and starts pulling away from the sides of the pan. Stop as soon as it looks matte – don’t overbeat.
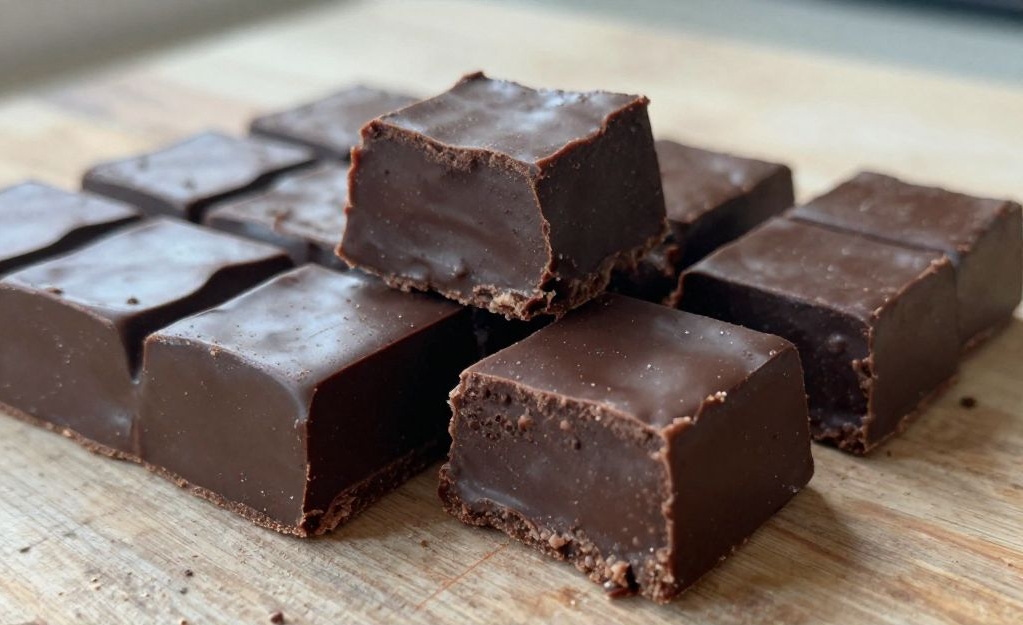
Pour the fudge into your prepared pan. Spread it evenly with the spatula (it will be thick). Let it set at room temperature for 2 hours, or speed things up in the fridge for 1 hour. Once firm, lift out the block using the parchment overhang. Cut into 16 squares with a sharp knife, wiping the blade between cuts for clean edges. Store in an airtight container as described above.