

You know that feeling when you bite into an apple pie and the crust shatters like a perfect golden leaf? That’s what we’re making today.
No sad, soggy bottoms or mushy filling here. Just a crispy, buttery, cinnamon-kissed pie that’ll make your kitchen smell like autumn threw up all over it (in the best way).
I’ve messed up more pies than I care to admit. So trust me – these little tricks are hard-earned. Let’s bake.
1. Allergens
This recipe contains wheat (gluten) and dairy (butter). The apples are obviously fine, but cross-contamination is a thing if you have severe allergies.
For a gluten-free version, swap the all-purpose flour for a good 1:1 gluten-free baking blend (look for one with xanthan gum). For dairy-free, use vegan butter sticks – just make sure they’re high-fat, not the spreadable tub kind.
Eggs aren’t in this dough (thank goodness), so no worries there. But always double-check your specific brands, especially if you’re serving someone with celiac or a milk allergy.
2. Ingredient notes & substitutions
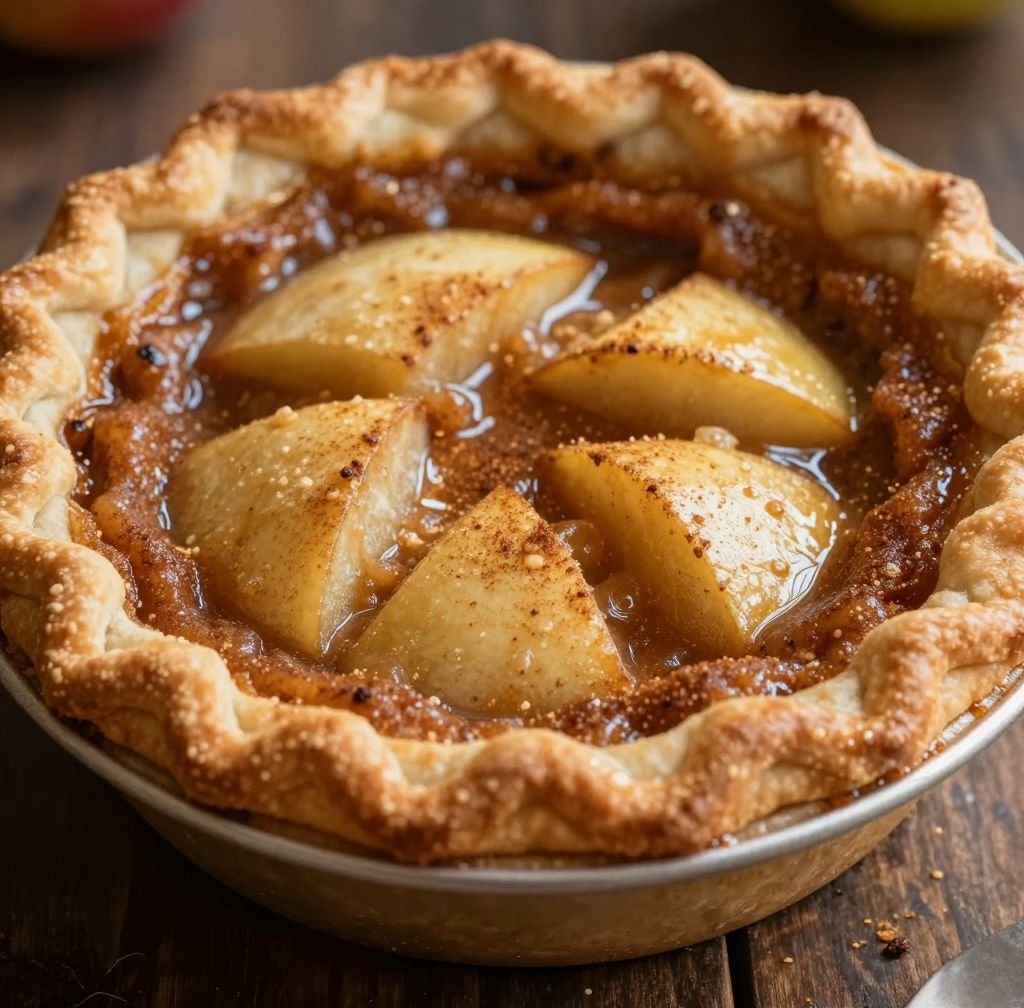
Let’s talk apples. You want a mix of firm, tart varieties like Granny Smith and something sweeter like Honeycrisp or Braeburn. One type alone can be either too sour or too mushy.
Butter is non-negotiable for that flaky, crisp crust. Margarine or shortening will give you a different texture – still edible, but not the same soul-lifting experience. Use cold unsalted butter, cut into tiny cubes.
For the sugar, brown sugar adds depth and a hint of molasses. White sugar works too, but you’ll lose that caramel note. And cinnamon? Go heavy. Like, “did I add too much?” No, add another ¼ teaspoon.
Lemon juice isn’t just for show. It brightens the apples and stops them from browning. A tablespoon of cornstarch or tapioca flour thickens the juices so you don’t end up with apple soup.
3. Pro tips
Keep everything cold. I mean it – your butter, your water, even your mixing bowl if your kitchen is warm. Warm butter melts into the flour before baking, and that gives you a dense, cracker-like crust instead of flaky layers.
Don’t overwork the dough. Mix just until it comes together. If you see streaks of butter, that’s a good thing. Those little chunks create steam pockets in the oven, which equal crispiness.
Chill the shaped dough for at least 30 minutes before rolling. Better yet, an hour. This relaxes the gluten and lets the butter firm up again. Skip this step and your crust will shrink faster than my motivation on a Monday morning.
4. Storage & make-ahead (fridge/freezer)
You can make the dough up to 3 days ahead and keep it wrapped tight in the fridge. Let it sit on the counter for 10 minutes before rolling – otherwise it’ll crack like dry earth.
Assembled unbaked pie? Wrap the whole dish in plastic, then foil, and freeze for up to 3 months. Bake from frozen – just add 15–20 minutes to the baking time and cover the edges with foil if they brown too fast.
Baked pie keeps at room temperature for 2 days (cover loosely with foil). In the fridge, it’ll last 5 days, but the crust will lose some crunch. To re-crisp, pop slices in a 350°F oven for 5–10 minutes. The microwave is the enemy here – it turns crust into leather.
5. Serving suggestions (complete the meal)
A warm slice of apple pie demands vanilla ice cream. That’s not a suggestion, it’s a law. The hot-cold contrast is half the experience.
If you’re feeling fancy, drizzle homemade salted caramel over the top. Or go the British route with a thick slice of sharp cheddar cheese melted on the side – weirdly amazing, I swear.
For a non-dessert pairing, serve it with black coffee or a spiced chai latte. The bitterness cuts through the sweetness perfectly. And if you have leftover pie for breakfast (no judgment), a dollop of Greek yogurt works too.
6. Use your leftovers
Got half a pie staring at you from the counter? Crumble it into apple pie milkshakes – just blend slices with vanilla ice cream and a splash of milk. It’s absurd and glorious.
The next morning, chop leftover pie into chunks and fold them into pancake or waffle batter. Or warm a slice, top with oatmeal, and call it “deconstructed apple crisp.”
You can even freeze individual slices on a baking sheet, then bag them up. Pull one out whenever the craving hits. Reheat in the toaster oven, not the microwave – trust the process.
7. Common mistakes & how to fix them
Soggy bottom crust is the number one heartbreak. Usually it’s from not preheating your baking sheet. Place your pie pan on a hot sheet pan in the oven – that extra blast of heat crisps the bottom fast.
Runny filling means you either skipped the cornstarch or didn’t let the pie cool enough. Yes, it’s hard to wait. But letting it rest for at least 2 hours allows the juices to set into a gel. Slice early and you get a puddle.
Burnt edges happen when you forget to shield the crust. Tear off strips of foil and loosely cover the rim after 25 minutes of baking. Or buy a silicone pie crust shield – it’s like a sunhat for your pie.
8. Variations by diet or flavor profile
Vegan: Use plant-based butter sticks (like Miyoko’s or Earth Balance) and a tablespoon of cold coconut oil in the dough. The filling is already vegan if you skip the egg wash – brush with oat milk instead.
Lower sugar: Replace half the brown sugar with monk fruit sweetener or coconut sugar. The apples will still be plenty sweet. You can also add a teaspoon of maple extract to fake the depth.
Spice it up: Add ¼ teaspoon of cardamom or allspice to the cinnamon. For a boozy twist, soak your sliced apples in 2 tablespoons of bourbon for 10 minutes before mixing. Just drain them first or your pie will be a drippy mess.
Caramel apple pie: Drizzle ⅓ cup of store-bought or homemade caramel sauce over the apples before adding the top crust. Sprinkle with flaky sea salt. You’re welcome.
9. Why this recipe works (the science)
Cold butter + minimal mixing = flaky layers. When cold butter hits a hot oven, the water in the butter turns to steam. That steam pushes the dough apart, creating those thin, crispy sheets you’re after.
The cornstarch thickens the apple juices without making them gummy. It activates around 200°F, right when the pie is finishing up. And the lemon juice keeps the apples from oxidizing into that sad gray color.
Two types of apples give you structure (firm apples hold their shape) and sweetness (softer apples break down into a jammy sauce). It’s the best of both worlds without any single apple overpowering the show.
10. Frequently Asked Questions (FAQ)
Can I use a store-bought crust? Sure, but you’ll lose that crispy, buttery magic. If you do, blind-bake the bottom crust for 10 minutes first to avoid sogginess.
Why is my crust shrinking? You stretched the dough when rolling it out. Always roll, lift, and turn – never pull. And always chill before baking.
Do I need to peel the apples? Yes. Apple skins get chewy and weird in a baked pie. Peel them with a vegetable peeler while watching TV – it goes fast.
Can I make this in a glass pie dish? Absolutely. Just lower the oven temperature by 25°F because glass heats up faster than metal. And watch the bottom crust – glass can over-brown it.
How do I know when it’s done? The crust is deep golden brown, and you see bubbles oozing through the vents. Those bubbles mean the filling is boiling and the thickener has activated. No bubbles? Give it 10 more minutes.
11. Call to action
If you make this pie (and you really should), drop a comment below and tell me how it turned out. Did your family fight over the last slice? Did you burn your tongue because you couldn’t wait? I want the messy details.
Share this recipe with someone who needs a pie win. And hit that subscribe button for more no-fuss desserts – I send out one email a week, no spam, just butter and sugar.
Conclusion
That’s it – your ticket to a crispy, buttery, cinnamon-spiced apple pie that actually works. No advanced degree in pastry required, just cold butter and a little patience.
Remember: the messier your counter, the better the pie. Flour on your shirt is a badge of honor. Now go preheat that oven and make your kitchen smell like heaven.
And when you pull that golden beauty out, let it rest. I know, it’s torture. But good things come to those who wait. Then slice, scoop ice cream, and enjoy every single crumb.
Recipe Name: Crispy Buttery Cinnamon-Spiced Apple Pie
Servings: 8 slices
Estimated Cost Per Serving: $1.85
Prep Time: 30 minutes (plus 1 hour chilling)
Cook Time: 55 minutes
Total Time: 1 hour 25 minutes (plus cooling)
Course: Dessert
Cuisine: American
Calories Per Serving: 487
Diet: None
Difficulty: Medium
Ingredients
For the crust (double-crust 9-inch pie):
- 2 ½ cups (315g) all-purpose flour
- 1 teaspoon salt
- 1 tablespoon granulated sugar
- 1 cup (226g) cold unsalted butter, cut into ½-inch cubes
- 6–8 tablespoons ice water
For the filling:
- 2 ½ pounds (about 5–6 medium) mixed apples – 50% Granny Smith, 50% Honeycrisp or Braeburn
- ¾ cup (150g) packed brown sugar
- 2 tablespoons all-purpose flour
- 2 tablespoons cornstarch
- 1 ½ teaspoons ground cinnamon
- ¼ teaspoon ground nutmeg
- 1 tablespoon fresh lemon juice
- 1 teaspoon vanilla extract
- Pinch of salt
For finishing:
- 1 large egg, beaten with 1 tablespoon water (egg wash)
- 1 tablespoon turbinado sugar (optional, for crunch)
Instructions
First, make the dough. In a large bowl, whisk together flour, salt, and sugar. Add the cold butter cubes. Using a pastry blender or your fingertips, cut the butter into the flour until the mixture looks like coarse meal with some pea-sized butter chunks remaining.
Second, add ice water one tablespoon at a time, stirring with a fork, until the dough just comes together when squeezed. It should feel slightly shaggy – do not add more water than needed.
Third, turn the dough onto a lightly floured surface. Divide it into two equal disks. Wrap each in plastic and refrigerate for at least 1 hour (or up to 3 days).
Fourth, prepare the filling. Peel, core, and slice the apples into ¼-inch thick slices. In a large bowl, toss apple slices with brown sugar, flour, cornstarch, cinnamon, nutmeg, lemon juice, vanilla, and salt. Let sit for 15 minutes at room temperature.
Fifth, preheat your oven to 400°F (200°C). Place a baking sheet on the middle rack to preheat as well.
Sixth, roll out one dough disk on a floured surface into a 12-inch circle. Carefully transfer it to a 9-inch pie plate. Trim the edges, leaving about ½ inch overhang. Pour the apple filling (including any juices) into the crust.
Seventh, roll out the second dough disk. Lay it over the filling. Trim the overhang to ½ inch, then fold the top edge under the bottom edge and crimp with your fingers or a fork. Cut 4–5 slits in the top crust for steam to escape.
Eighth, brush the entire top crust with egg wash. Sprinkle with turbinado sugar if using. Place the pie on the preheated baking sheet in the oven.
Ninth, bake for 25 minutes. Then reduce oven temperature to 375°F (190°C), and cover the crust edges with foil or a pie shield to prevent burning. Bake for another 30–35 minutes, until the crust is deep golden brown and you see bubbling juices through the slits.
Tenth, let the pie cool on a wire rack for at least 2 hours before slicing. Yes, two full hours. The filling needs time to set. Serve warm or at room temperature with vanilla ice cream.